Wednesday, June 26, 2019

The Work in Progress Project Chapter Three: Making a Rag Quilt

I’ve never made a rag quilt before and if I’m being totally honest I had watched a YouTube video on how to make one and I thought it looked easy - like I could whip it up while half asleep. 


I was wrong- while it’s not a complicated concept, it is harder than it looks.

I had all the winceyette squares cut up and decided that I would make it a small baby quilt and use some of my left-over Bounce Fabric by Allison Harris so I didn't have to buy any more fabric to finish this quilt I cut these up to the same size as my winceyette squares and laid them out and then sewed them together with a simple cross. I didn’t bother with batting but realised afterward that some cotton batting might have made it a nicer and warmer quilt. Although it did still turn out to be a nice light quilt, which might be nice as part of a layer of quilts. 


The first thing I stuffed up was getting the winceyette fabric the wrong way on some squares, and then when I laid out the front squares, they got also got mixed up in the wrong order. I decided it was the back, so I could live with that.

I found sewing a half-inch seam allowance as opposed to the normal scant 1/4” I usually use, to be a bit of a challenge. Mainly because it just felt wrong even though that’s what you need to do for a rag quilt. 


About halfway through sewing them together I decided to take a break and come back to it the next day. Turns out that was also a mistake. Because when I came back to it I misjudged my seam allowance on the next row and had to unpick it all and do it over. Plus I had somehow stuffed up my layout in the 24 hours since I had put it down. Lessons for next time - lay it out and sew it all together (or at least keep a consistent seam allowance) 

But the main thing I found hard was sewing with the wrong sides together and leaving raw edges. It felt wrong and every time I picked up a new square to sew I pinned it together with the bounce fabric together, and would have to flip it around again. I think because I tend to you the same method of Foundation Paper Piecing most of the time, my brain has gotten lazy and I found my fingers would automatically put something together, and I would have to make a very conscious correction. In this respect, this project was great for making me actively concentrate on my sewing!


Once I had it all together and had sewn around the edge, it was time to cut the seams. I felt very nervous doing this, as I didn’t want to cut into the sewn lines. It also took a long time to make sure I got them all. By the end of it, my hand hurt from all those little cuts with the scissors! But I did get to watch a couple of the episodes of the TV show I'm currently binging as well so - hey -  I'm all for that kind of multi-tasking!

Then I washed it and it looked really good. All my fears that it would shed fibers were alleviated. 


So making my first rag quilt was a fun, if not challenging experience. For something that seems to be a simple concept it did push my boundaries and taught me things I can use for next time, so I was pretty happy with it. 

I took this quilt along to the local hospital with my Truck quilt and donated them to the Special Care Baby Unit for a special little human there. 

That's another Work in Progress finished! 3 Down and 7 to go!
How many do you have left?

Wednesday, June 19, 2019

Paper Pieced Goat Pattern for the Farm Animal Quilt Along.

During May for the Farm Animal Quilt Along the animal was a Goat. There were some awesome looking goats created, from colourful and bold to just damn cute. The pattern for the goat had two options, one was a simpler version that featured just a close- up of the Goat's Face, while the other version was more complex with some smaller pieces and more templates, but showed the whole goat.


I have to say my favourite version was this version by Marie Sheppard. I love the bold colours she used to make her goat. He is just so Funky!

My own goat has a bit of a problem with his eyes. I think next time I will stick to a solid colour instead of the black and white fabric I used, but apart from that he is quite handsome.


I really liked this version by Donna, who placed her goat in amongst some flowers. I'm sure he was happy to be munching away on them!


Julia has decided that she is going to make each of her animals in a different colour of the rainbow. Her goat looks fabulous in green, and the spotted horns make him quite special.


Mellissa's goat also looked very handsome in some neutral tones!


We are currently working on some cows for our quilts and I cant wait to show you some of them soon - There are some quite strikingly beautiful cows made already!

The Goat Pattern is available in my Etsy store. I hope you join us in making your own Farm Animal Quilt!

Happy Piecing!

RJ

Thursday, June 13, 2019

The Work in Progress Project: Little Concrete Truck Quilt


This Little Concrete Truck started as a 9" orphan quilt block that I was initially unsure what to do with. I had shrunk down the initial 12" pattern and had initially thought about using this for a magazine photo, but then I stuffed up the front wheel and forgot to add the mudguard. I finished the block and threw it in my to be decided pile, and there it stayed for several weeks.

Then a few weeks later while I was enjoying some time with my local quilting Guild Papamoa Patchers, one of the ladies there announced that the local hospital needed baby quilts for their special care nursery, which the babies would get to keep. I instantly knew I wanted to help because I know first-hand how brilliant the staff who work there are and the amazing work they do.

As soon as I got home I pulled out this block and took another look at it. Even though I had messed up the colour around the front wheel, it is still clearly a truck and I'm sure some little person somewhere would still love this quilt. So I attached some colourful borders ensuring that it was the size required 20" x 24" (50cm x 60cm) and then left it on the bed for several weeks as a flimsy (an unquilted quilt).


It sat there staring at me while I moved on to other projects. Is it because I get overly excited about all the quilts I want to do? Probably, but also partly because I have the attention span of a goldfish!

This week I finally picked it up, gave it a hefty dose of the iron, basted it and started quilting. I made sure to use 100% natural cotton batting for this quilt since I knew it would be used for a baby and natural fibers breathe better and help them to regulate temperature better.  It actually only took me a couple of hours to quilt it using only straight stitching in the ditch of the borders, and then outlining the truck.


Then I found some nice soft winceyette in my stash and used that for the binding. Binding only took me another hour all up. It makes me wonder why I procrastinated so long!


I love how it turned out, it's so bright and fun and I hope the little person who gets to use it will like it.

Work in Progress Project Status: 2 finished out of 10.

Happy Piecing!

RJ

Monday, June 10, 2019

The Work in Progress Project: Chapter 1, Doing a Foundation Paper Piece Quilt Swap

I recently signed up for my first ever quilt swap. I've never done one before, so it was all a pretty new and exciting experience for me. The swap was run on Instagram by @shoppershaz_swaphost and was supposed to be a secret swap. I was assigned to a 'team' of swappers, and would secretly make a quilt, cushion or tote bag for one of the team, while someone else was making something for me. We were required to post photos of our progress on Instagram as we went, without revealing who we were making a quilt for.

Of course,

this was before I realised how many half-finished quilts I had. At the time of starting the Work in Progress Project, I had nearly finished this cushion/quilt and only had to finish off the hand stitching on the back of the binding.


I had chosen a pattern which was designed by UnicornHarts called "Oh Deer". I really enjoyed looking at the patterns available in UnicornHarts' store and was even more excited to find some of them were free such as her Candy Cats pattern and Mr. Squeak pattern (I couldn't resist downloading the Candy Cats pattern and will probably make some of these up in the future after the WIPProject).

Initially, I was unsure if I wanted to make this pattern and then make 3 different patterns to complement it, or make the pattern 4 times in different colours for the cushion cover. I decided to make the first block and then decide once I had completed the first block.

The first block was not good. The problem was that after making it, I believed it looked a bit like a demonic mouse (you can see that version on Instagram here). The colours I had initially picked out were based on my partner's preferences as she had stated them in her sign-up form. She had reported that she liked mint and grey. They did not suit the pattern, and even worse, she commented on my fabric choices and stated she didn't like the colours I had picked! Turned out that what she was actually after was not mint, but more of a teal green colour.

So I tried again. I had to modify the pattern very simply by adding more of a forehead, but this time I think I nailed it and based on the comments my partner left on Instagram - she agreed - so I was feeling much better about it.


After completing this block I decided to make different blocks to go with this lovely deer. I chose some Butterfly Charm Blocks which were designed by Lillyella. There are three patterns in this collection, and I decided to make one of each butterfly for my quilted cushion cover, using the same colours as I had used for 'Oh Deer'.

Each of the butterflies has a different name, there is Pepper, Gidget and Cricket. These patterns were cute, but very fiddly, especially because I had decided to fussy cut the background fabric in my deer and wanted to do the same in the Butterfly Charm blocks for consistency. Also, my sewing machine did not like the Gidget Butterfly and decided to eat it - twice. But I persisted and third time convinced her (Bernina) to let me make Gidget.


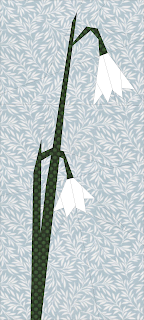
There was a bit of a hole in my quilt - so I designed a custom block with a Snowbell (its a pretty little white flower that as a kid I used to find in the orchard a lot), but I turned the flower pink. My subscribers will receive their own copy of this block in my monthly email in July - so make sure you are signed up!


Now I have finished it. I hope my partner likes what I made for in the end. It certainly wasn't without some very significant frustrations. But I did learn a lot during the process and it was a lot of fun.


Would I do a swap again? - Absolutely! And I would recommend every quilter do it at least once. I learned so much about myself, and improved my own skills. I also bought some fabric colours and patterns that I would not have looked twice at before, and now I think I will use them again because I discovered that I really like the colours both in combination with each other and on their own.

Work in Progress Project Status: 1 finished out of 10.

Happy Piecing!

RJ


Sunday, June 9, 2019

The Work in Progress Project: I’m making a list and checking it...once.

Counting up my Works in Progress 

For the first mission of reducing my WIPs and potentially reducing my stash is to actually count my WIPs and work out which ones were easiest to finish and the hardest as well as which ones were urgent or have a deadline. This took me a day to sort out on its own, I thought I would have about 5 WIPs. I was wrong, but I did manage to come up with a list and in order of ease and priority. Here it is:

  1. Finish binding my #fppswap2019 cushion. This is an easy one. All I have to do is finish hand-stitching the back of the binding.
    I’m so close and I had a deadline to work to, so I’ve been pretty good about this one. It’s still worth noting though. This will be the first one to tackle. 
  2. Make and finish binding my second version“Riding the River Rapids” Quilt. This quilt is my second version of this quilt. The first is being featured in Make Modern Magazine in July. This just goes to prove that if I have a deadline - I can usually finish something.  What’s worse is that I did actually quilt this one, but then I got bored and put it to one side- and there it has stayed since the end of last year. It’s time to finish it so I can then work out what I’m going to do with it.
  3. My Second Shape-O Quilt. What is this still unquilted? Am I that easily distracted? So this quilt top is finished, but it needs to be quilted and bound. Do I even have backing fabric for this? I still have to work that out. 
  4. Another flimsy (an unquilted top). This little gem is a nine-inch Concrete Mixer Truck block which I whacked a Border on and plan to donate to the local hospital’s Special Care Baby Unit when it’s done. 
    I have got the backing fabric for it, and it’s only a small quilt 50x60cm, so this shouldn’t be a hard task.
  5. Grandmothers Garden Lap Quilt. I have 6 more blocks to create for this as well as quilting and binding. The good thing is that there is a deadline on this one as it is the one I’m making blocks for Online Quilt Magazine every second month in 2019. So it has to be finished by December. I know I’m best when working to a deadline.
  6. Tommy Turtle Quilt.  The shells are meant to be scrappy, so that’s a good way to dig into my scraps and existing stash without having to dig into my pockets for the cash to buy more fabric. Here’s what I have so far: 
     
    and here’s what it should look like: 
  7. Farm Animal Quilt. These blocks got away from me. I got carried away on the thrill of my on little quilt-along and then forgot to plan my own quilt out properly. My saving grace here is that each animal at least has a white background, so they should be ok together despite being a bit of an odd combination to look at now. I also have 5 more blocks to create- so I might be able to plan something out from here to tie my existing colours together a bit better. 
  8. Up in the Air Quilt - I’m least excited about this one. I think this is another one that I got bored with. Also, I really didn’t like the background colour I used, I’m wondering why I used it at all now! So far I have 6 blocks and I tried to free motion Quilt one of them. It did not go well. I will have to unpick some stitches and probably need to make some more blocks to finish this quilt well. 
  9. Then there’s this Orphan Iris Block that I need to do something with. 
    I’m tempted to make another Sweet Pea Satchel for this, but I’m still undecided. Any suggestions? 
  10. Lastly, there’s a Rag Quilt that I have started cutting squares out for and not yet started sewing. 

OK, there were quite a few more than I thought (actually- double), but some of them should be fairly easy to finish. On the other side of the coin, I still have other less interesting stuff to do - like finish making curtains for the house now that winter is here (I haven't included this in my list, but probably should)

How many WIPs do you have? Hopefully not as many as I have!


Happy Piecing!

RJ 

Friday, June 7, 2019

The Work in Progress Project: A mid year resolution...

Like many other Quilter’s I have a problem. It’s an addiction really, a bad habit of starting projects before finishing the last one - actually last several (We quilters call these WIPs or Works in Progress). I wonder if it was a Quilter who came up with the saying 'put a pin in it' because that is exactly what I have been doing...

  
Photo by Lisa Woakes on Unsplash

If you take a brief look in my sewing room, you will find a couple of flimsies (finished quilt tops that are yet to be quilted), a quilt that has been waiting since January to get binding, Orphan Quilt Blocks and blocks from unfinished quilt tops in various piles around the room. 

What goes hand in hand with this is buying more fabric for a new project, or perhaps an existing one, that I probably didn’t need to buy and let’s face it- might just sit in a pile with all that other unused fabric (We call this our "Stash") I justify my fabric purchases by saying I have started a new project or I might need it one day for that project that I haven’t started or finished.

I was just about to sign up for the #100days100blocks2019 hosted by GnomeAngel when I realised this would be yet more fabric and another quilt that I would start and perhaps not finish. So instead I made a mid-year resolution to actually finish some of my WIPs before I start any further projects. 


Photo by Brooke Lark on Unsplash


Here’s how I plan to do it: 

  1. Count the WIPs that I have.
  2. Order them from easiest to finish to hardest.
  3. Work on one project at a time until I’m caught up, and try to use what I already have in my stash where possible.
  4. Blog my progress on at least a weekly basis so my followers know what I’m up to and can keep me honest! 

I’d like to think by December I can get all my WIPs finished. But the reality is I have about 2 hours each weekday when my son is asleep to sew. I also have curtains to make for the house and so it’s the stolen furtive time that I can sneak every now and then, such as the occasional evening when my husband is away for work, that just might add up to the success of my mission. 

Are you keen to join me? 
Hang in there- this could get tough. 

RJ


Thursday, June 6, 2019

Tommy the Turtle. Pattern Released!

Today Tommy the Turtle was released into the wild!

My husband and I both have a quilt to curl up under on the couch and chair, and recently our toddler son has decided to remove these blankets when we are using them and curl up under them himself and a lot of the time he won't share with us. As a result, I decided he needed his own quilt for the lounge. 

He loves Turtles and I tried to find a pattern with a turtle. No such luck so I cranked out the crayons and drew one - which my son then pointed to said "Tur-Tol" and promptly drew over top of it with his own crayon. It didn't matter - he was happy and I had enough to work with. When he went to have his afternoon nap, I fired up EQ8 and started working with my sketch to turn it into a 12" Foundation Pieced Pattern which I have called Tommy the Turtle

My plan was to make a Bale of Tommy Turtles crawling on the sand or swimming in the sea, with one facing a different direction to the others. 


So far though - I got sidetracked and have only made one and it is another Work in Progress:


I recognized quite quickly that there is a bit of a gap in the quilt pattern market here. Lots of quilt patterns and no easily discoverable Foundation Pieced Turtle Patterns? My suspicions were confirmed from the response I got when I posted my planned pattern on Instagram asking for testers. I got more people than I needed to test and felt really bad about having to turn a few of them away. 

Here are some of the great turtles that were made by my testers:

This version was sewn by Lisa Lee from Coffee and Fabric. Lisa made Tommy a Tula Turtle and I think he looks great with those bold greens! This was also the first time that Lisa had tested a pattern. Lisa has started her own quilty-blog and has been sharing her adventures. Totally worth reading and following Lisa on Instagram!


I hadn't thought of using Brown for the Shell until I saw this version by Kait from @beautifulthingsinacrappyshed. Kait made her turtle for her son, who also loves turtles. I cannot thank her enough.  Kait has also recently made my Wally Whale Pattern. You can find more of her work on Instagram.


Another version that I thought was just Beautiful was this lovely Green and Purple Tommy Turtle. Vickie got lots of positive feedback from her followers on Instagram for her version, and you can see why with such a pretty turtle! Follow Vickie on Instagram here


Donna wanted to make her version for her Grandson who loves Turtles. She had a very affectionate helper who became more of a hindrance at times...


So I will keep working on my Turtle Quilt for my sone and in the meantime, you can make one too! The Tommy the Turtle pattern is now available to purchase in my Etsy store.

Happy Piecing!
RJ