
Hello!
I am Nessie and I have taken this blog hostage for the day! I am a Foundation Paper-Piecing pattern designer. Today I am going to go over the basic steps in the FPP pattern making process. I have a new pattern, “Lady in Red,” and will use that quilt pattern as an example!

I am Nessie and I have taken this blog hostage for the day! I am a Foundation Paper-Piecing pattern designer. Today I am going to go over the basic steps in the FPP pattern making process. I have a new pattern, “Lady in Red,” and will use that quilt pattern as an example!

Steps to making a Foundation Paper Piecing
(FPP) Pattern:
- Choosing inspiration
- Design the pattern
- Make the template pieces
- Template Layout
- Piecing Diagrams and Directions
- Pattern Testing
- Publishing
Choosing Inspiration
 |
This is one of my favorite steps! My
artistic mind goes crazy with ideas. I have to reign it in while I do research
because there are several important things to remember.
- Choose something you like! I tried making custom patterns for others, and honestly, it was hard because I just didn’t feel like it was mine.
- Copyright. If you are using copyrighted artwork, you could be breaking the law. If you are designing a Star Wars quilt for your grandson, no big deal. If you want to publish the pattern, do research and make your own sketch to use as inspiration.
- Keep it simple! Few colors, for me I try to keep it at around 5-8 colors max, though I have seen plenty of quilts that use much more. The less detail the easier it is to design.
For ‘Lady in Red’ I used a digital sketch I drew, avoiding any copyright issues. The sketch is also fairly simple with only 5-6 colors.
Pattern Design
There are two main ways to do this. Using
software like Adobe Illustrator or using tracing paper. The basic steps are the
same using both methods.
1. Decide on the size of your
block – I use Adobe Illustrator and my favorite block size is 18 X 18 inches.
The blocks turn out big, and the template pieces usually fit really well on 8.5
X 11 letter paper. If you are using tracing paper you can go with the size of
paper you have or tape pieces together to get to the desired size.
2. Block your paper piecing
pattern – I use 3 line sizes (some patterns may need more or less but I found
this works for all my patterns so far). Large lines to block the biggest
blocks, medium lines to denote the smaller blocks, and small lines denote the
sewing lines within each block.
3. Color and get feedback on the first
draft –Color your first draft. Does it look right, do you need to make changes?
Ask friends if they like it and listen to what they say.
4. Final Draft!
Template
Pieces
This part takes some time so buckle up:

As you can see in the diagram above, I have labeled the template pieces from “Lady in Red.”
Notice I used numbers and letters to aid in piecing. I also used a pattern fill
as a fabric color guide on the pattern.
- Number and label your template pieces in the order you will piece them.
- Color code your pattern – you can use symbols, patterns, even colors.
- Seam Allowance? – I like having a ¼ inch seam allowance on my patterns, others don’t.
It’s your pattern, so decide what works for you. This will require a few extra steps if you are using tracing paper.
Template Layout
If you are using tracing paper, this step can be skipped. If you are using software like Adobe illustrator there are a few options:
1.
There are 3-4 main sizes of
paper you can print your templates on.
a. Letter and Legal (A4) Paper –
Pro: can be printed on most home computers. Con: larger paper template pieces
may need to pieced and taped.
b. Poster paper up to 36 inches in
width and unlimited length found in most copy shops. Pro: No need to piece
large template pieces. Con: extra cost in printing at a copy shop.
2.
Use
marks to aid in joining paper template pieces.
Pattern Instructions and Piecing Diagrams
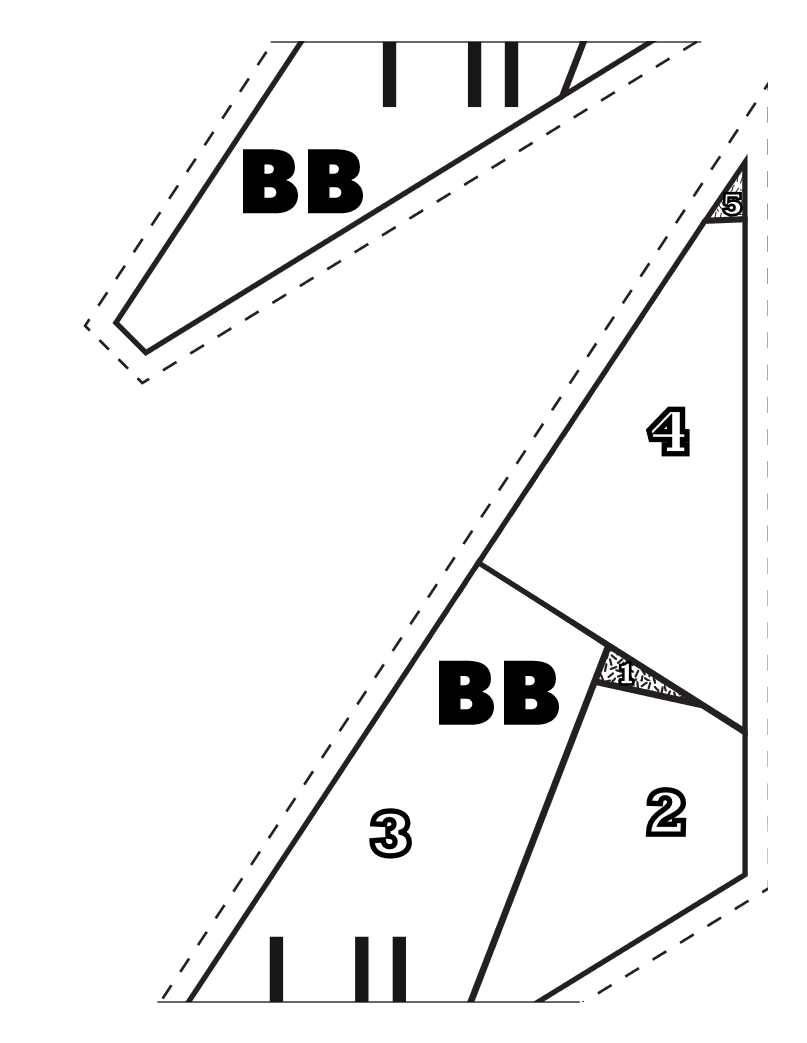
Above is a template piece layout example with ¼ inch
seam allowance (dashed line) and marks (thick black lines) on the template
where the template piece needs to be taped.
Piecing diagrams and directions are both
important.
1. Who is your audience?
a.
You - what do you need to make
sense of a pattern? If you are experienced and it’s your own design, you may
only need piecing diagrams.
b.
Publishing – is it for
beginners or experienced quilters? I consider FPP a hard skill, therefore, I
never recommend a beginner to try my patterns.
2. Skills required? – Do you want
to teach how to do FPP in the pattern or do you just want to focus on the pattern?
I tend to focus on the pattern and skip the teaching.
3. Fabric
yardage considerations – FPP patterns are interesting in that often you need
yardage of a couple fabrics, and scraps or fat eighths is enough for the other
colors.
Testing the Pattern

You are always the first tester! Depending
on your future use you may need more testers!
1. I always find mistakes in my
patterns!
2. Others may notice mistakes you
didn’t.
3. Versatility and Feedback
4. How long? Give them some amount
of time and expect them to take at least twice that amount of time.
5. Incorporating feedback
In my design, I made the background and
face the same color. When I got quilts back from testers, almost all of them
had the background and skin different colors. Do I need to rewrite the pattern?
No, I instead included a page at the end with instructions on how to label your
template pieces if you want to change the color of the sky, earrings, or hat.
Publishing
There are few easy ways to self-publish
your patterns:
2.
PayHip – downloadable PDFs
3.
Wordpress – downloadable PDFs
4.
Printing and Selling – great
for pop-ups and vending
Thanks for reading. I really hope some of
you are inspired to make your own FPP patterns! I would love to see your
creations so please give me a like and follow on Facebook and Instagram
@ByNessie505, and tag me in your FPP photos!

Lady in Red is available in Nessie's Etsy Shop from 24th of May 2019
No comments:
Post a Comment